
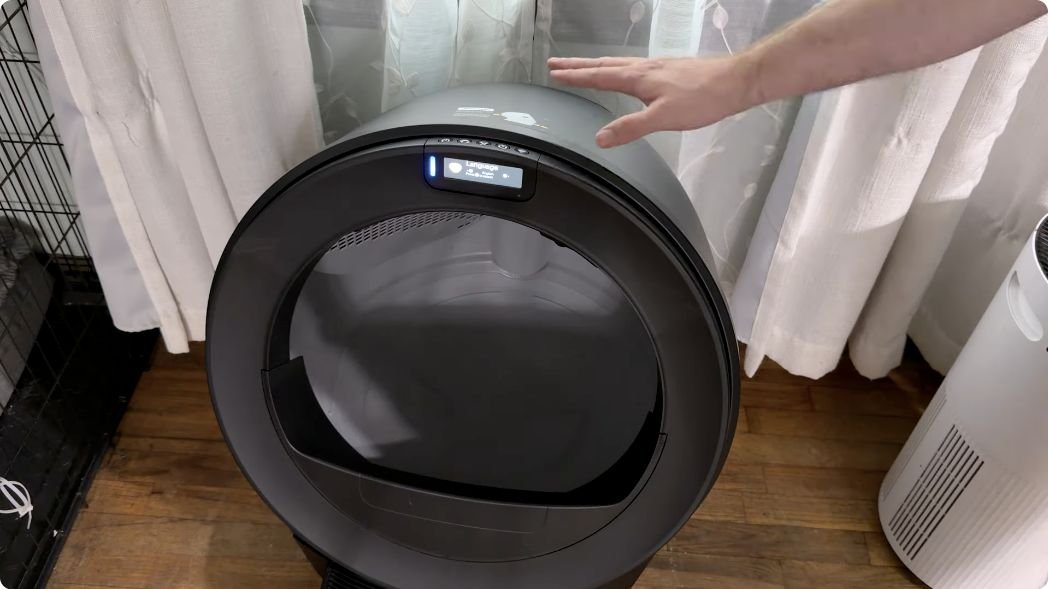
You emptied the waste drawer, put in a fresh bag, and the litter box still smells. Before assuming the automatic box is the problem, check the litter that stayed behind and the surfaces that waste touches.
With my automatic litter boxes, I look beyond the waste bag. Old litter, urine running down the walls, and small smears left during a cleaning cycle can all leave you with more cleaning to do. The machine removes clumps; it does not wash its own interior.
This guide covers the homerunPET CS106, my Litter-Robot 5 Pro, and the open-top PetPivot AutoScooper 12 I reviewed. The same basic troubleshooting approach applies to a regular litter pan, but cleaning instructions and replacement parts depend on the exact model.
Quick answer: Why does the litter box smell after emptying?
- The litter remaining in the box needs a complete change.
- Urine has contacted the walls or liner before reaching the litter.
- Waste has rubbed against interior surfaces during a cycle.
- The drawer, waste opening, or an approved removable part still has residue.
- A liner or pad needs cleaning, inspection, or replacement.
- An odor-control filter or deodorizer needs attention.
Start with the visible mess. Emptying a bag solves the waste-storage part of the job, but it cannot remove contamination elsewhere.
1. The remaining litter may need to be fully replaced
One reason I would check first is the age and condition of the litter. Adding a fresh scoop on top can make the bed look better without removing the older material underneath.
Litter does not keep controlling odor indefinitely. Depending on the formula and usage, odor control can decline and small contaminated particles can remain even after the larger clumps are removed. This is the same maintenance issue you face with a traditional litter box.
If the litter itself smells after the waste drawer has been emptied, a full change may be more useful than another top-up. Follow the litter maker’s replacement guidance and the machine’s emptying procedure. Pair a full change with cleaning when the interior is dirty, so fresh litter is not going straight onto a soiled surface.
For litter selection, see my Litter-Robot 5 Pro litter comparison covering clumping, dust, and tracking.
2. Your cat may be peeing on the walls or liner
The urine does not always land directly in the litter bed. A cat may aim toward the side, allowing urine to run down the interior before it reaches the litter and forms a clump.
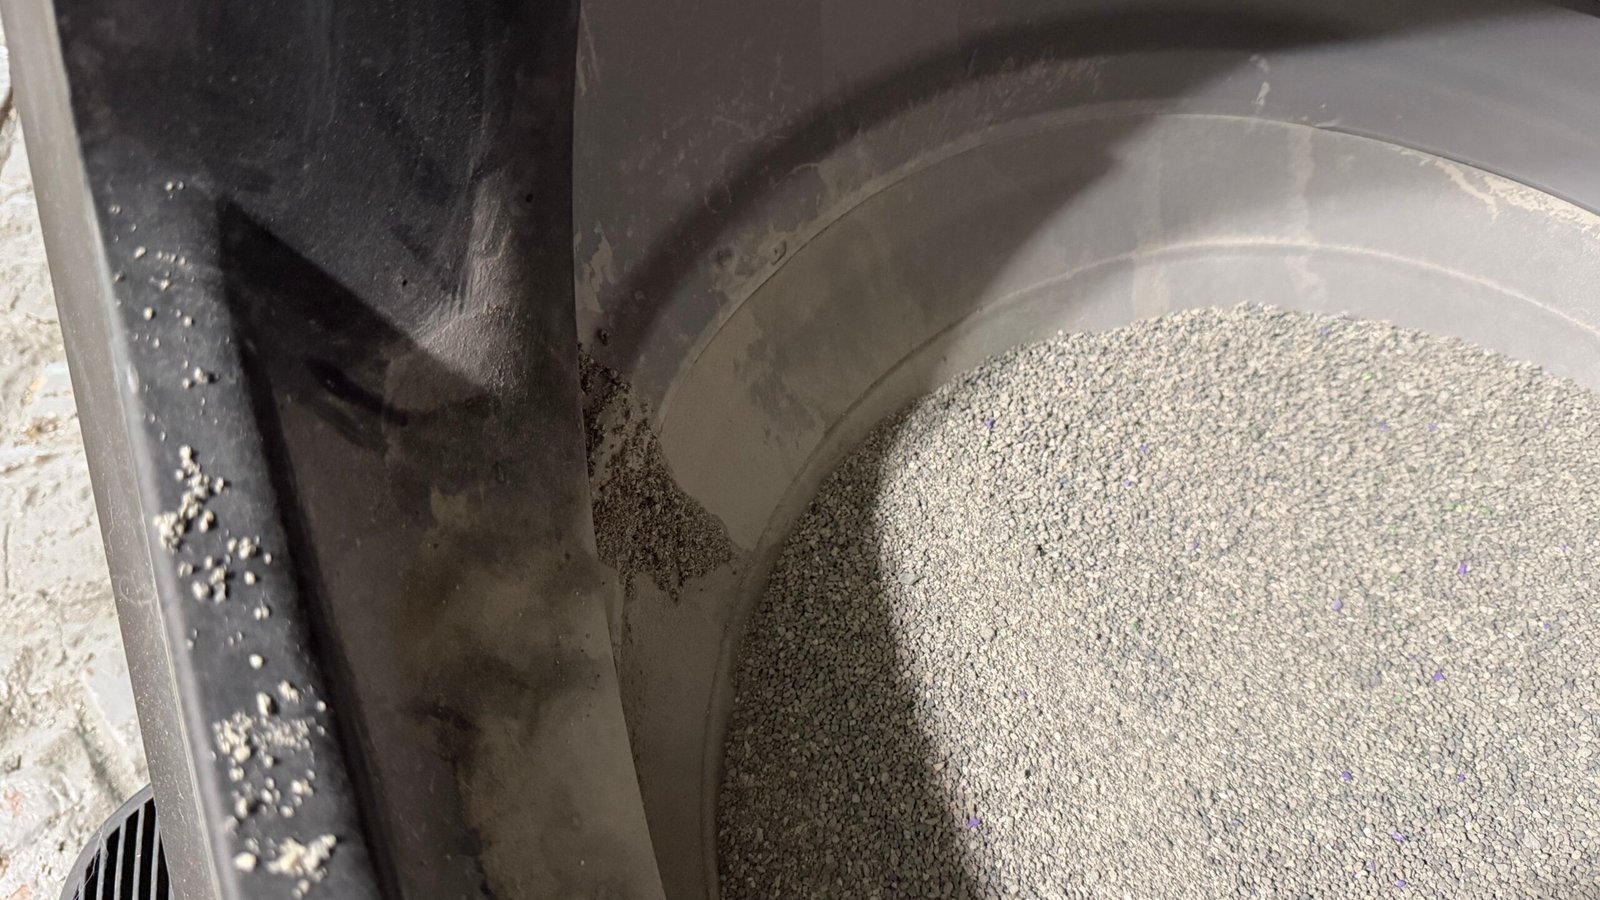
The clump can be removed successfully while a small amount of residue remains along that path. Look above the litter line, around the entrance, and along accessible seams. A box can appear clean from the doorway while the upper surfaces tell a different story.
Whisker’s official FAQ explains that high spraying can require more frequent interior cleaning to remove residue. That is a useful distinction: a design can direct urine into the litter without eliminating the need to clean the surfaces it crossed.
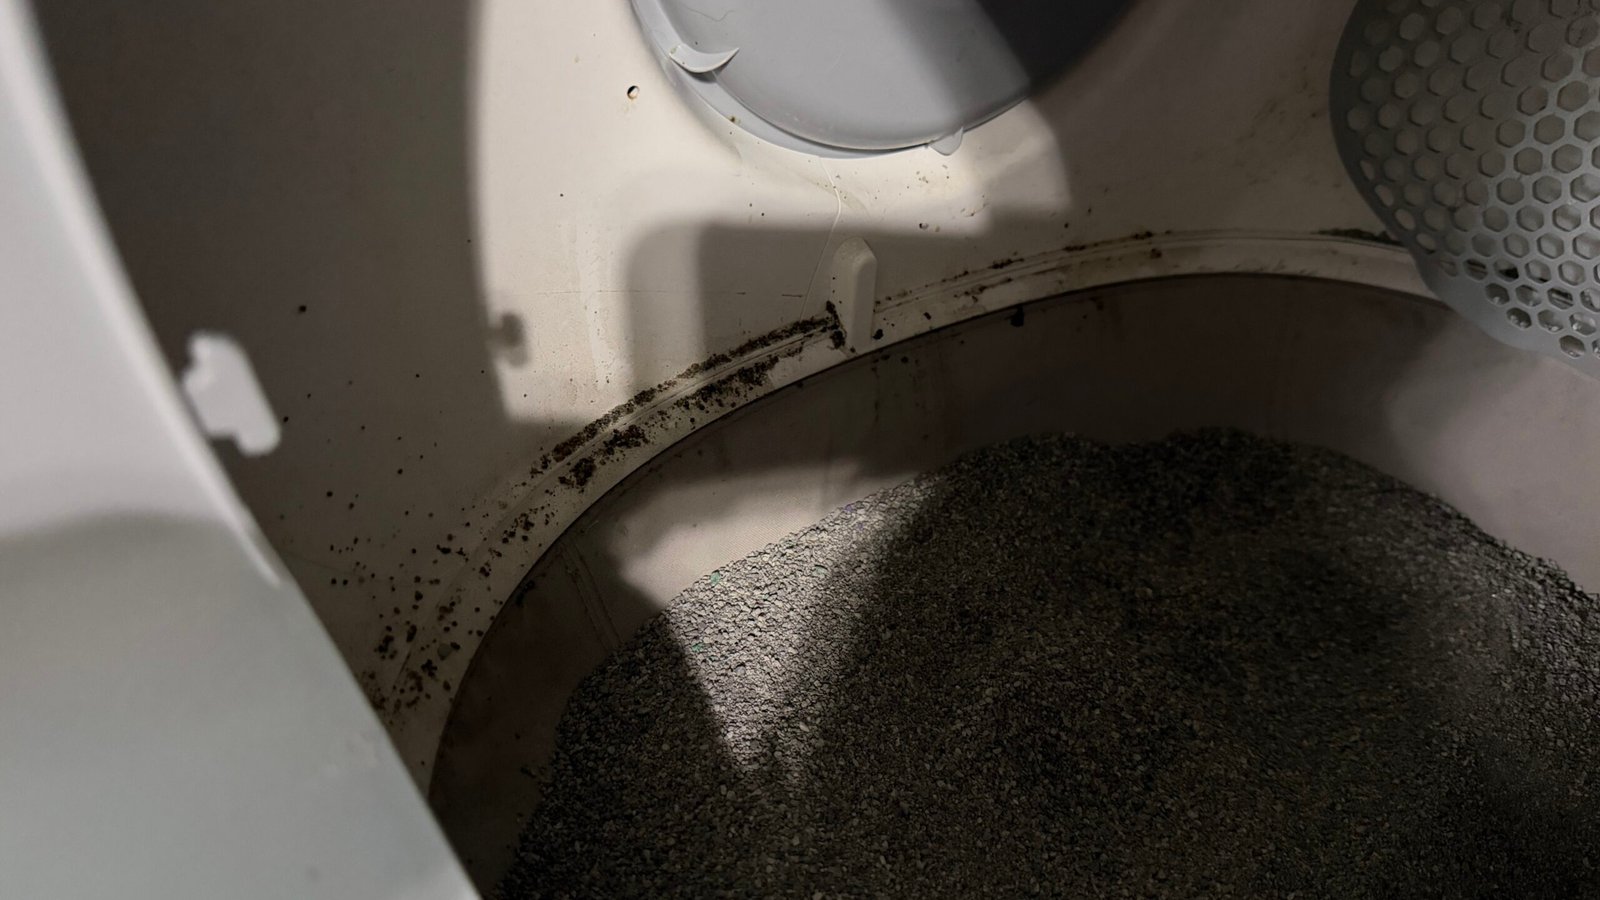
These are my own photos from the boxes I use. Notice the exposed walls and the boundary between the liner and the litter. Those are places I check when odor remains. A photo shows residue, but it cannot tell us whether every mark is urine, fecal material, dust, or damp litter.
3. Small waste smears can build up over time
Another area I would inspect is anywhere a clump might touch during rotation or disposal. Waste rubbing on a wall, the edge of an opening, or the liner can leave a thin film that is easy to miss.
Repeated traces can become an odor source even when the drawer is freshly emptied. Check with a light, and clean accessible contamination using the method approved for that part. If the smell seems strongest around the drawer, inspect the drawer itself and the accessible waste-drop area as well as the bag.
If you keep finding wet smears, also review your litter choice, fill level, and supported cycle-delay settings. Cleaning removes the residue already present; identifying why it keeps returning helps reduce repeat work.
How often should you clean the actual litter box?
There is no single measured average that fits all automatic litter boxes. Emptying the waste, replacing all litter, spot-cleaning surfaces, and taking removable parts out for washing are separate jobs.
My practical starting routine is to inspect daily, remove visible residue promptly, and review the need for a full clean monthly. That is a housekeeping starting point, not a substitute for the model’s instructions. Odor or visible soiling is a reason to act sooner.
| Box or task | Cleaning interval to use |
|---|---|
| Any litter box | Check daily. Clean contamination when you see it rather than waiting for a reminder. |
| Litter-Robot 5 / 5 Pro | Whisker: basic globe cleaning every 1–3 months; deep cleaning at least every 3 months. More cats can mean shorter intervals. |
| PetPivot AutoScooper 12 | Its current guide: empty waste about every 5 days, with 7 days the maximum; wash the bin every 15 days; change all litter and clean the chamber and bin monthly. |
| homerunPET CS106 | Use the cleaning reminders in your app and your model’s instructions. Review the interior monthly as a practical starting point and clean sooner if it smells or has residue. |
Sources: Whisker’s 5 and Pro care guide and the PetPivot AutoScooper 12 user guide. These are model-specific recommendations, not interchangeable schedules.
Whisker further suggests deep cleaning every 2–3 months for two cats, every 2 months for three cats, and monthly for four or five cats. A full drawer is not the only signal to clean: urine residue or persistent smell may require attention before those intervals.
PetPivot AutoScooper 12: cleaning, litter and replacement pads
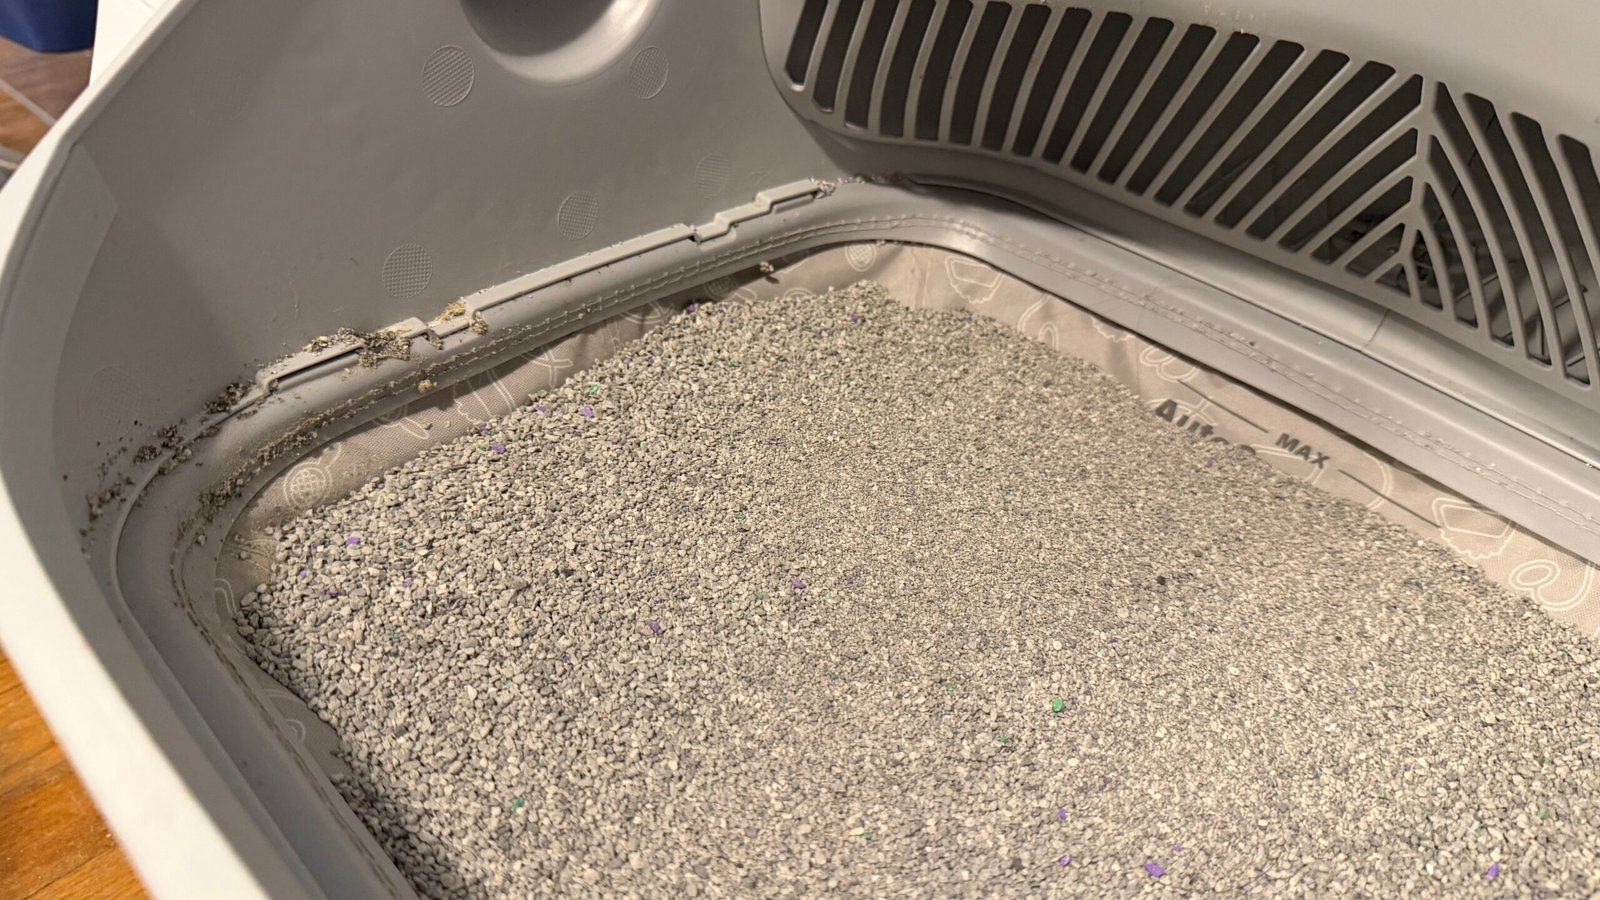
My PetPivot has an open top, so it is easy to look into the chamber. That visibility is useful, but the walls, pad edges and waste-contact surfaces still need inspection. In my photos, you can see stuck material outside the main bed of loose litter.
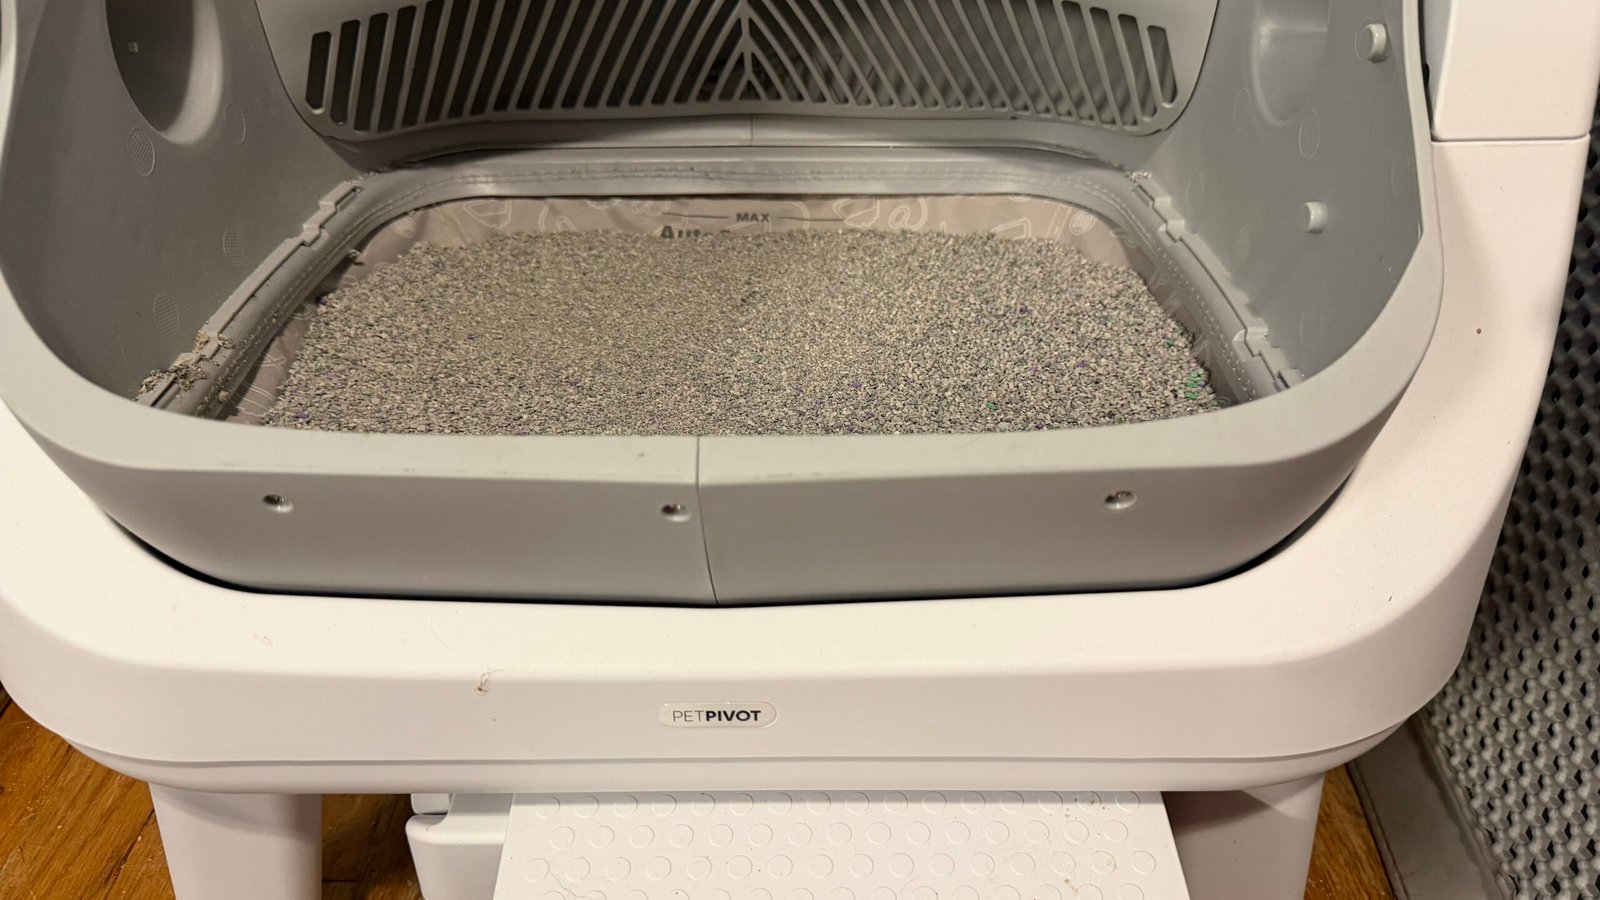
PetPivot’s cleaning guidance recommends unplugging first, washing the removable chamber and litter bed with water and a soft brush, and drying everything completely with the opening facing upward. Keep the electrical base, power connection and adapter dry. Avoid bleach, harsh or scented cleaners and abrasive tools. Use your exact model’s guide for removal and reassembly.
For litter, PetPivot specifies small-particle clumping mineral or bentonite litter. Non-clumping litter, crystals and long-strip tofu litter are unsuitable. Keep the fill between MIN and MAX and press Litter Added after refilling. Choose a low-dust formula and keep sensor areas clear; “dust-free” on a bag does not remove the need to inspect the machine.
Can the PetPivot litter pad be replaced?
Yes. PetPivot lists an AutoScooper 12 replacement litter base bed in a two-pack. This is the reusable pad under the litter, separate from the disposable waste bag. The manufacturer describes removing it by its edges and gently rinsing or wiping it; a spare lets one pad dry while another is in use. Confirm your exact model and current availability before ordering.
I would clean and dry a dirty pad first, then inspect for damage or odor that remains. Residue around its edges is a reason to clean, not proof the entire pad needs replacing. If it is torn, deteriorating or persistently smells after approved cleaning, ask PetPivot about the correct replacement.
Using the homerunPET app’s cleaning reminders
One feature I use with the homerunPET litter box is the app’s cleaning schedule and reminders. They help keep maintenance from becoming something I remember only after noticing a smell.
I would still inspect the actual box between reminders. A schedule cannot account perfectly for a cat peeing against a wall or an unusually messy visit.
The official CS106 tutorial page and manual are the place to check disassembly and washing instructions. The manual says to disconnect power before cleaning, keep the electrical base out of washing water, avoid water above 40°C on washable parts, and let those parts dry thoroughly before reassembly.
Can you replace the homerunPET CS106 litter pad?
Yes—there are replacement liners, but match the dome version first. Cleaning is the first step for a soiled pad. If it is damaged or still holds an odor after approved cleaning and complete drying, ask support whether replacement is appropriate.
HomerunPET lists a CS106 Triple-Protection Pull-Out Style Liner for the upgraded dome. Its product page distinguishes that version from the screw-fixed liner for the classic dome and says the two are not interchangeable. For the screw-fixed version, it directs customers to support before ordering.
That matters if you have seen a quick liner-swap video: your own CS106 may use a different attachment system. Confirm the version and current availability before buying, and follow the corresponding instructions.
Is the Litter-Robot 5 Pro rubber liner replaceable?
Yes. Whisker publishes a globe liner replacement guide specifically for Litter-Robot 5 and 5 Pro. This is the flexible rubber surface inside the globe, not the disposable bag in the waste drawer.
The official liner installation guide describes powering off and unplugging, removing the globe, separating its sections, and exchanging the liner. You must retain the old liner’s weight and weight retainer for the replacement. It requires screwdrivers and careful reassembly; it is more involved than changing a waste bag.
The guide confirms that replacement is possible, but it is not a guarantee that a standalone liner is currently in stock. Contact Whisker with your model and serial number to confirm the correct part and any warranty coverage. Do not assume a liner sold for the 3 or 4 fits the 5 Pro.
For any box with a flexible pad, inspect its condition during cleaning. Staining alone does not prove it needs replacing; tears, deterioration, or odor that remains after proper cleaning are reasons to discuss the part with the manufacturer.
Check filters and deodorizers after removing the source
Odor-control accessories can help, but I would not use them to cover up dirty litter or residue. First remove the contamination, then check whether the model’s filter or deodorizer needs renewal.
Whisker’s care guide calls for a carbon-filter change about monthly under normal use. For the CS106, follow the directions for its Fresh Gel Deodorizer. Neither accessory makes an overdue full clean unnecessary.
A simple order for tracking down the smell
- Empty the waste bag and inspect the drawer for residue.
- Check whether the remaining litter itself smells and needs a complete change.
- Inspect walls, the liner, and accessible waste-contact surfaces.
- Clean only the parts and surfaces approved in your model’s instructions.
- Let washable parts dry fully, then reassemble and refill correctly.
- If odor persists, check the pad’s condition, odor-control accessories, and the surrounding floor or mat.
Power down and unplug before hands-on cleaning as the manufacturer directs. Keep electrical parts dry, do not mix cleaners, and provide a clean backup litter box while the machine is unavailable. If contamination has reached an inaccessible area or electronics, contact support instead of washing the whole machine.
Watch my automatic litter box reviews

Watch my homerunPET CS106 versus Litter-Robot 5 Pro comparison for a look at the two machines I discuss here.

For the box that is not fully enclosed, watch I Tried the PetPivot AutoScooper 12 and Here’s What Happened! You can also read my written PetPivot AutoScooper 12 review. An open top changes access and visibility, but it does not eliminate cleaning.
My approach to keeping litter box smells down
When the smell remains after the waste is gone, I work through the litter and the surfaces it touches. Sometimes the answer is a complete litter change. Sometimes it is urine on a wall or a thin smear that has built up. And sometimes a worn or persistently soiled liner needs attention.
The useful distinction is between a box that scoops itself and a box that cleans itself completely. Automatic litter boxes handle the first job. We still need to handle the second.