
I built the Garvee Life 6×10-foot aluminum polycarbonate greenhouse in my yard, and my initial impression was positive: it was light, easy to move, and straightforward to put together. Laying out the numbered parts before starting made the assembly much easier to follow.
This Garvee Life 6×10 greenhouse assembly guide follows my build from the base to the sliding door. It also includes an important update that came after I posted the video: several viewers reported that their roof window would not line up properly. Mine worked, but those reports deserve attention before you buy or assemble the kit.
Affiliate disclosure: I may earn a small commission if you purchase through my links. Your price stays the same, and it helps support SLVRBCK Troop. As an Amazon Associate, I earn from qualifying purchases.
Important update: viewers reported roof-window alignment problems
My roof window fitted without this problem. Several people later contacted me through the video comments because their window did not line up or close correctly. These are reports from other owners, rather than a fault I experienced with my own greenhouse.
I reached out to the company about the issue, but I did not receive much practical help. The response was essentially to drill holes that line up so the window could close correctly. I also found that the instructions do not explain the window-installation section in enough detail.
I have not tested that drilling suggestion and cannot confirm it fixes the problem. Before making permanent changes, check the frame alignment, window orientation, and supplied brackets against the instructions. Photograph the mismatch and ask the seller for model-specific guidance, replacement parts where appropriate, and clarification about the effect of any modification on returns or warranty coverage.
That update changes how I would describe this kit: my build went smoothly, but a trouble-free window fit is not something I can promise every buyer. Check the vent operation while the surrounding components are still accessible.
Can you really build it in a day?
My video shows an assembly I found manageable, but it does not document a timed start-to-finish test. I would not turn the title’s one-day question into a guaranteed build time. Your site preparation, experience, help, and any alignment problems will affect how long the job takes.
Set aside enough time to sort the parts, work through the drawings, and test the door and roof vent. Rushing the last few connections can undo the time you saved earlier.
Watch my greenhouse assembly video
Before assembly: lay out the parts and prepare the site
I unpacked everything and lined up the frame pieces with their number labels visible. The plastic panels also had identifying stickers. Keep the fasteners organized separately so you can match each drawing without digging through a pile of similar-looking parts.
- Choose a level, stable location with room to work around all four sides and slide panels into the frame. Prepare the support and anchoring arrangement specified for your site before building on it.
- Keep the kit’s current manual nearby. The part numbers below describe the version in my video; check your own labels if the kit or instructions have changed.
- Have the tools specified by the manual available, plus a tape measure and level for checking the base. Use gloves when handling frame edges and get help supporting sections as needed.
- Check the panel markings for the required outward-facing side. My panels had clear film on one side and white film on the other, but film color alone is not a universal guide to UV-side orientation.
Step 1: assemble the base and identify the door side
At 0:25, I connected base pieces 1 and 2 using connector 42. Pieces 3 and 4 then connected to those rails with 32A and 32B. In my kit, piece 3 formed the front—the side with the door.
Pay attention to the lower door track: its channel needs to face the correct way, and the fin I point out in the video faces upward. Check that the base is level and square before adding the upright walls. A skewed starting frame makes later panel, door, and vent alignment harder to assess.
Step 2: build the back wall and slide in its panels
The back-wall section starts at 1:02. I installed uprights 5A and 5B, followed by pieces 14 and 15 with the 42B fasteners. Piece 29 attached on the inside of the lip using piece 41.
The panels slide into the frame grooves. Once a panel was seated, piece 20 fitted along the top to hold the assembly together. I repeated that process for the remaining lower panels, then installed the upper panels marked E, F, and E.
For the upper frame, my kit used pieces 10 and 11, connector 34 in the middle, and 33A and 33B on their respective sides. Follow the drawing’s left/right arrangement rather than assuming two similar pieces are interchangeable.
Step 3: assemble the front wall around the doorway
At 2:47, I moved to the front wall. Much of the sequence repeats the back: upright pieces 5A and 5B, the center supports, piece 29, and the lower panels with their top retaining pieces.
The front has a different upper-frame arrangement because of the doorway. My version used pieces 8 and 9 with 34, 33A, and 33B. Work from the front-wall drawing so the door opening and its supports are positioned correctly.
Step 4: connect the long side channels and roof structure
I joined pieces 6 and 7 twice to make the two long side channels, then fitted one along each side. This connects the front and back into a single structure.
The roof section begins around 4:24. I assembled the components shown in the roof drawing, including 23A and 20 with 42A. Keep checking that the frame stays aligned as the longer members go into place.
Step 5: install the roof window and test its alignment early
At 4:36, I slid the window’s rounded hinge section into the matching groove and moved it toward the 23B side. The center roof piece then attached. Later, pieces 18A, 18B, and 22 formed the window-support arrangement shown at 6:25.
Check both the hinge engagement and the support layout against the manual. Open and close the vent to see whether it meets the frame correctly, and test the adjustable prop positions. If it does not line up, stop and investigate rather than forcing it shut.
The viewer reports described above are why I would give this step extra attention. I can show how my window went in, but I do not have a verified repair procedure for the alignment problem others encountered.
Step 6: fit the side panels without trapping the corners
The side-panel section starts at 5:02. On the vertical pieces I showed, the positioning hole belonged at the upper end so the piece 29 connection could be made. The panel-entry groove also needed to face outward.
The middle panels and corner panels do not enter the same way. My two center panels slid down into their slots, while the corner panels needed to enter horizontally. I removed the top screw at that corner to create clearance, slid the panel in, then returned the rail to its groove and reinstalled the screw.
Use the matching drawing for your kit and restore every connection you loosen. If a panel will not enter, check its size, orientation, and groove alignment before bending it or pushing harder.
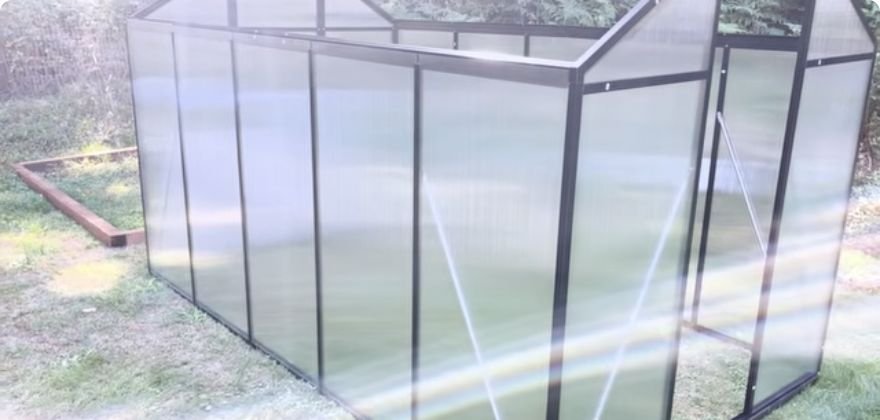
Step 7: complete the roof panels and gutters
At 6:07, I slid the B panels into the upper channels and closed them in with the P17 pieces, repeating the arrangement on the front and back sections. I then finished the remaining roof-frame pieces and the window supports.
The side member shown next also acts as a gutter. Fit it in the position shown in the manual and check that panel edges are seated in their channels. Recheck the vent after the surrounding roof parts are secured; an earlier fit check is useful, but the finished assembly still needs to close correctly.
Step 8: assemble and hang the sliding door
Door assembly begins at 6:56. I built its frame, slid in the final two panels, and fitted piece 26. The door wheels then entered the track so it could slide across the opening.
Test the full travel and fit the supplied retaining piece shown near the end of the video. That piece helps keep the door from coming off the track. Check the handle and any supplied locking hardware before calling the door finished.
Step 9: anchor the greenhouse and do a final walkaround
At 7:51, I demonstrated the supplied hook-and-stake arrangement: the hook attaches to the frame clip and the stake goes into the ground. That shows what I used; it is not a wind-load or snow-load test.
Choose anchoring that matches your ground or foundation and the manufacturer’s requirements. A lightweight greenhouse being easy to move is also a reason to take anchoring seriously. Check for buried services before driving anchors into the ground.
- Confirm the base and frame remain square and all required connections are secured.
- Check that every panel is seated, especially the corners where you loosened a connection.
- Open and close the door and verify its track retainer is installed.
- Test the roof window closed and in its prop positions, with particular attention to the reported alignment issue.
- Inspect the anchoring and follow the kit’s care instructions for weather conditions.
What I liked—and what this build did not prove
I liked the organized, numbered assembly process and the light finished structure. The sliding door and adjustable vent were useful features in the demonstration. I also noticed considerable heat inside during the walkthrough, so ventilation is something to manage rather than forget after assembly.
The product description advertises faster installation, high light transmission, and UV protection. I did not measure those performance claims. This video also does not establish storm resistance, snow capacity, or year-round growing performance. Treat it as a hands-on assembly account, not a long-term weather test.
Would I recommend this greenhouse?
I was happy with my own build, but my recommendation now comes with a clear qualification: read the roof-window update and be prepared to inspect that area carefully. Several owners reporting the same fit problem matters, even though my unit did not have it, and the company’s response did not give me a clear, tested solution to pass along.
If the kit suits your space and you are comfortable working through an aluminum-frame assembly, my video and these steps can help you understand the process. If you want detailed instructions and a predictable window fit with little troubleshooting, those reports are a reason to ask questions before buying.
Check the Garvee Life greenhouse listing on Amazon. Confirm the size, current kit version, included anchoring, and return terms before ordering. This is an affiliate link; I may earn a small commission at no extra cost to you.
See more of my practical projects in the DIY & How-To section.