
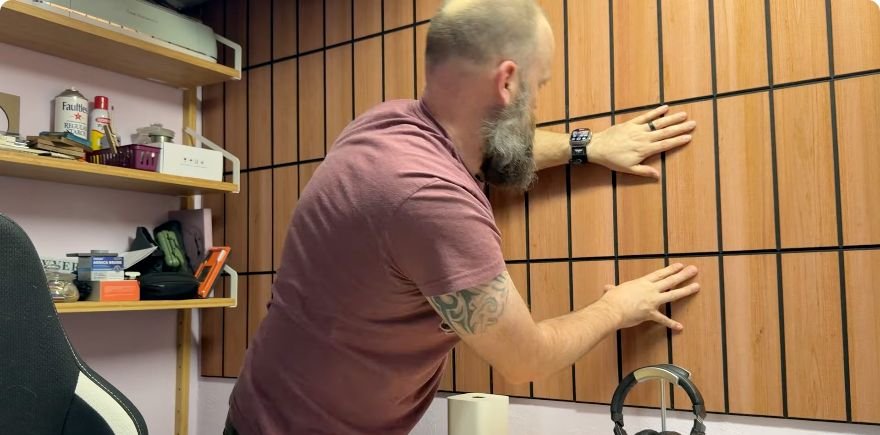
I wanted acoustic wall panels for the room where I record, but I also wanted the wall to look good when I was finished. These high-density polyester panels gave me a clean, wood-look backdrop without a complicated mounting project. In this acoustic wall panels review, I’ll show what I liked about the installation, how they stuck to my textured walls, and the cutting detail I would plan around before putting up the first piece.
Affiliate disclosure: As an Amazon Associate, I earn from qualifying purchases. If you buy through my links, I may earn a small commission at no extra cost to you. It helps support SLVRBCK Troop.
See the six-piece acoustic wall panel set on Amazon
My verdict: an easy installation and a sharp-looking wall
I like these panels, and I recommend them for someone who wants a straightforward way to add acoustic treatment with a finished decorative look. I installed my arrangement in one evening and was easily able to customize it for my wall. The panels felt lightweight, the colors matched well across the pieces I used, and I did not notice a strange smell.
The large adhesive backing was the practical standout. Instead of adding separate mounting strips or fitting brackets, I peeled off the backing paper, lined up the panel, and pressed it onto the wall. That worked for my painted, textured surface. The two things I would plan carefully are the first row’s alignment and where any cut edges will end up.
Panel size, material, and how many you need
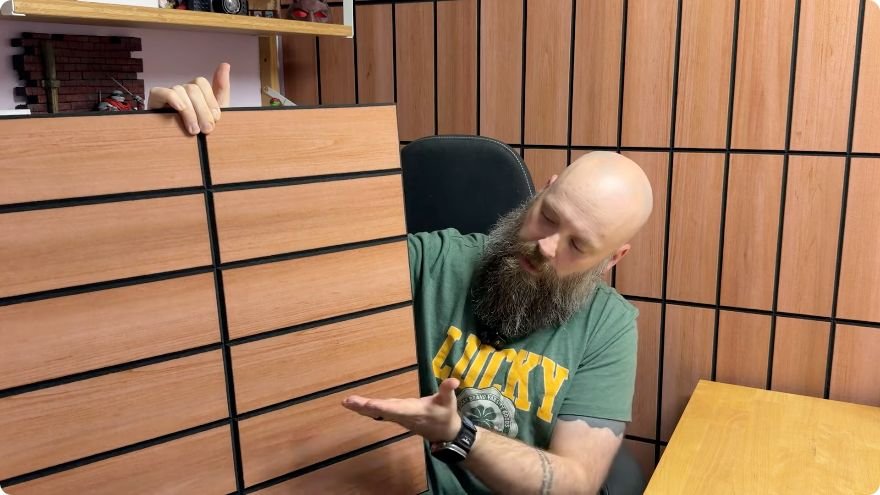
The set featured here is sold as six high-density polyester sound-absorbing panels. Each panel is a 23.62-inch square, with a wood-look face and black lines that give the finished wall its pattern. This is not a claim that the panels are solid wood. The stated weight is 2.2 pounds, and I found them easy to handle during installation.
In the video, I describe my layout as three panels wide and three panels down. A full three-by-three arrangement needs nine panels, so a single six-piece set will not recreate that coverage. Three uncut squares span approximately 70.86 inches, or just under six feet, in each direction before allowing for installation gaps. Measure your own wall and work out the count before ordering.
You can rotate the panels to run the pattern vertically or horizontally. I chose the direction that suited my room, but I would decide on that orientation before cutting or exposing the adhesive.
Did they stick to my textured walls?
Yes—on my walls. The installation guidance recommends a flat, smooth, painted surface. My walls are painted but textured, and I did not have trouble getting these panels to stick. The adhesive covers the entire back, so I was able to give each panel a firm press across a large contact area.
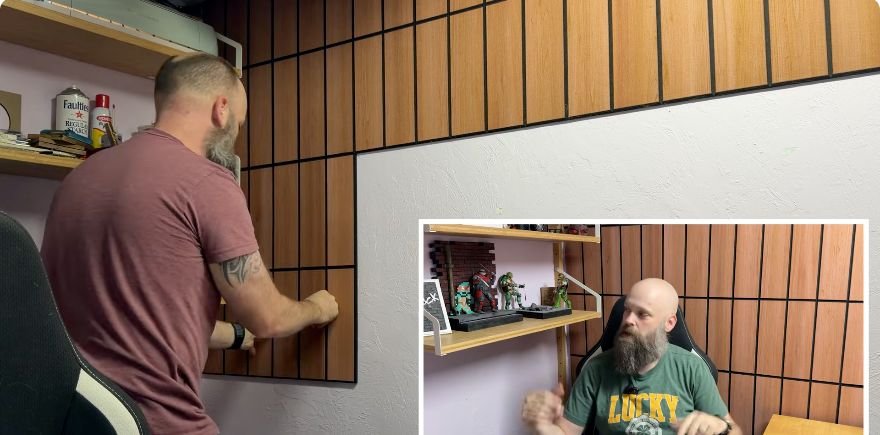
That is my installation experience, rather than a guarantee for every textured surface. Paint condition and the amount of texture can change how much of the backing makes contact. Follow the supplied instructions, check that your surface is suitable, and try one panel before committing to a whole wall. I have not tested removal or long-term adhesion, so I would not describe them as damage-free or renter-safe.
How I approached the peel-and-stick installation
1. Plan the layout while the backing paper is still on. Measure the wall, choose the panel orientation, and decide where full pieces and trimmed pieces should go. Check the pattern against shelves, corners, and the top and bottom of the covered area.
2. Establish a straight starting point. Check both vertical and horizontal alignment. A level and a light reference line are useful here: a slightly crooked first panel becomes much more noticeable as the rows grow.
3. Prepare the wall according to the instructions. The specified surface is smooth and painted. Make sure the wall is clean and dry, and check the instructions for any restrictions before sticking a panel over existing paint.
4. Peel off the backing paper and align the panel. In the video, I show the full adhesive backing. Line up the edges before pressing the panel into place; do not assume you will be able to slide it around or reposition it without affecting the adhesive or paint.
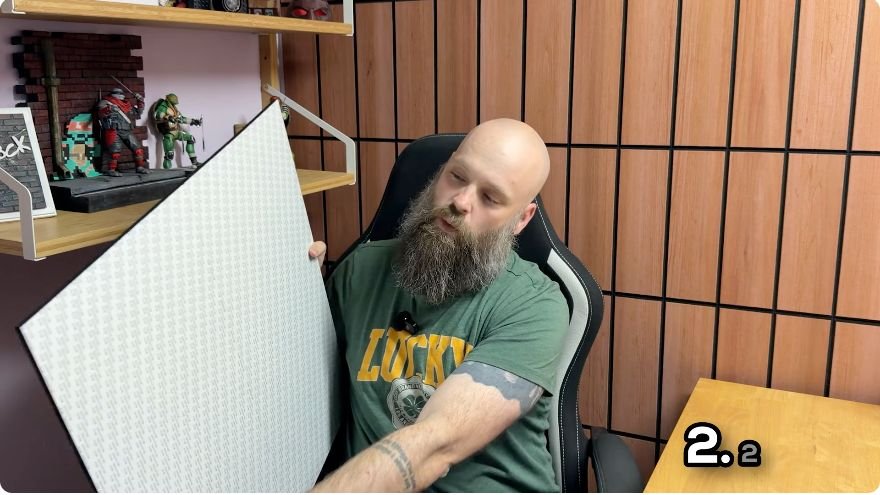
5. Press firmly and check the next panel before attaching it. I gave each panel a firm press, then continued the arrangement. Match the pattern and the factory-finished edges as you go. Taking a moment to check each piece is easier than discovering a drifting row after the whole wall is covered.
My most important cutting tip: keep cut edges at the perimeter
These panels can be cut to fit your space. The material is black through the cut area, so trimming it does not expose a pale core that would immediately stand out. That makes customization easier, but it does not mean every cut will disappear.
All four factory edges are chamfered. A fresh cut leaves a different edge profile. If you place that cut edge next to the chamfered side of an uncut panel, the joint will not match the other seams properly.
My recommendation is to put trimmed edges at the edge of a wall, at the top, or at the bottom of the arrangement. Keep the factory-finished edges facing neighboring panels wherever possible. Decide which side needs trimming before you rotate the panel or start cutting, and follow the product’s guidance for the cutting tool and method.
The black cut material helps the perimeter look less conspicuous, while preserving the chamfered edges between panels keeps the interior pattern more consistent. This is the detail I would consider first if fitting around a corner, shelf, or a wall that does not take a whole number of squares.
Acoustic treatment and soundproofing are different jobs
These are sound-absorbing panels intended for treating reflections and echo inside a room. That is different from stopping noise coming through a wall or keeping your recordings from being heard next door. Acoustic specialist GIK Acoustics explains the same distinction between room treatment and soundproofing. That general distinction is useful here; it is not a performance rating for this product.
My video focuses on installation and the finished appearance. I did not take before-and-after reverberation measurements or run a sound-isolation test, so I cannot give you a measured echo reduction, a decibel reduction, or a verified absorption rating. My recommendation comes from the easy setup, the look, and how well the panels fit my recording-room project.
Watch my acoustic wall panel review and installation
The video shows the panel orientation, full adhesive backing, and my installation on a painted textured wall. You can also see the color matching and how the pattern looks behind my recording setup.
Who I would recommend these panels to
I would consider these for a home office or recording space where appearance and an easy wall installation matter. I like the warm wood-look finish, the consistent colors across my panels, and the fact that I completed the work in one evening. They are a practical option if you want sound treatment that also becomes part of the room’s decor.
Before buying, check your wall’s suitability, calculate how many squares you need, and plan the trimmed edges. If your main problem is noise traveling between rooms, look into sound isolation instead of expecting these panels to solve it. For my project, though, I’m happy with the result: they look sharp, were simple to put up, and were easy to customize.
Check the current acoustic wall panel listing and price on Amazon
Find more hands-on product tests on my Reviews page, or browse my DIY & How-To guides for other home projects.