
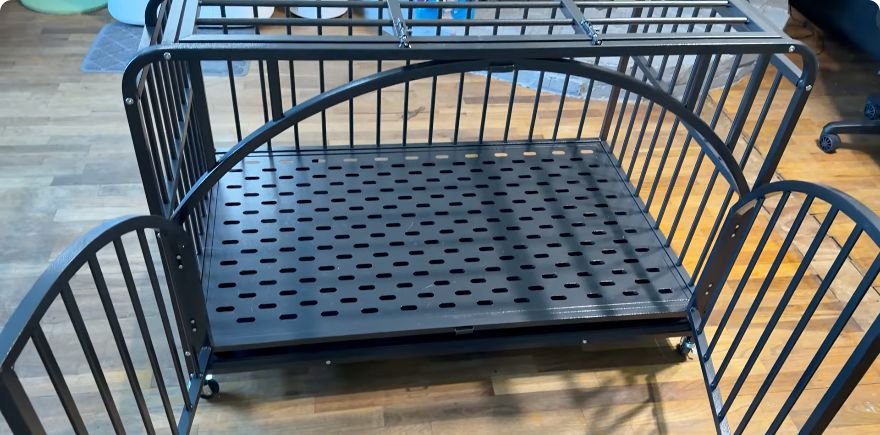
A heavy-duty dog crate can look impressive in a listing. I wanted to know how this French door model actually went together, whether the finished frame felt solid, and how it behaved with my dog inside. After assembling it and trying the doors, lid, wheels, and tray, I’m pretty happy with it—but there are a couple of details I would check before buying.
Affiliate disclosure: As an Amazon Associate, I earn from qualifying purchases. If you buy through my link, I may earn a small commission at no extra cost to you. It helps support SLVRBCK Troop.
Check the French door dog crate on Amazon
My quick take on this French door dog crate
The wide double-door entrance is the feature I like most. Both doors swing out, so getting a dog in and reaching the interior is easier than working through one narrow opening. Once assembled, the frame felt sturdy and didn’t wobble in my demonstration. When my dog moved around inside, I wasn’t hearing the kind of metal rattling I expected.
The opening top is convenient for petting a dog or handing in a treat, and the caster wheels help with repositioning an empty crate. My main reservations are the top’s travel—it has no built-in opening stop—and the removable tray, which does not make the bottom completely leakproof. This is an assembly and initial-use review, rather than a long-term escape-resistance test.
Check the actual size before buying for an XL dog
The product is marketed as a 48-inch crate. In my video, I describe it as 46.5 inches wide, 28.5 inches deep, and 26.5 inches tall. Treat those as the stated overall dimensions, not confirmed usable interior measurements. Door openings, the floor, and a bed can all affect the space your dog actually has.
The dog shown inside during my demonstration is my bulldog. That shows how the doors and latches work; it does not establish that every XL dog will fit. Before ordering, check the seller’s interior measurements against your own dog. Your dog should be able to stand comfortably, turn around, and lie down fully stretched out. That fit guidance is also part of the RSPCA’s crate advice.
How I assembled the crate
I laid out the panels, floor, lower support bars, caster wheels, hardware, and instructions before starting. The kit in my video included an Allen wrench for the bolts and a small wrench for the casters. Keep the supplied instructions beside you: the steps below explain my build, and hardware labels may vary with a different version.
1. Join the front frame and side panels
Start with the front frame and attach the two sides. Pay attention to the lower gap and the alignment of the holes so the panels are oriented correctly. This creates a U-shaped frame. On my kit, this first stage used eight A bolts.
Start each bolt by hand and leave it slightly loose. I wait until all the bolts in that stage are threaded before tightening them. That gives the panels room to line up and helps avoid cross-threading. If a bolt resists immediately, back it out and check alignment instead of forcing it.
2. Seat and secure the floor
The perforated floor sits on the support clips inside the frame. Make sure it is fully seated before fastening it to the rails. I used the B screws at this stage, with two on each side. Check that the floor is supported evenly rather than hanging from a partially aligned screw.
3. Attach the back panel
Fit the back panel with its lower clips supporting the frame. I started at the upper corners, which made it easier to hold the panel in position and align the remaining holes. Once the back was secured, the structure felt noticeably solid.
4. Add the lower bars and caster wheels
With the empty crate turned over, install the two lower support bars and the four casters. My kit had two locking wheels and two nonlocking wheels. Use the supplied wrench to secure them, following the wheel positions in your instructions. Get help turning the frame if needed, and keep pets away while it is upside down.
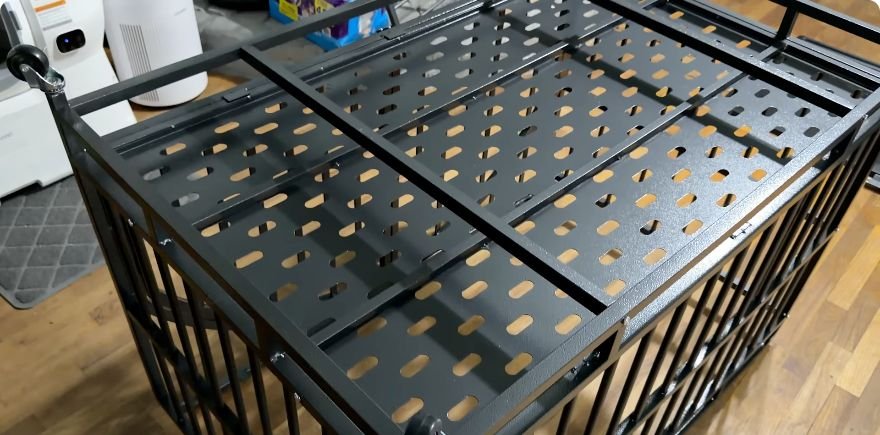
5. Fit the top with its mounting holes at the rear
The top mounting pieces need to line up at the back, opposite the French doors. I secured this stage with the B screws, then checked that the top could lift and close without binding. This orientation matters: fitting it backward would put the opening arrangement on the wrong side.
6. Slide in the removable tray
Slide the tray into its lower tracks until it sits flush in position. Try removing and reinserting it now, while the crate is empty, so you know where to grip it and can check that it moves freely.
7. Check alignment, bolts, and every latch
Return the crate upright, finish tightening the fasteners, and check for movement in the frame. Open and close both front doors and the top. Make sure the spring-loaded latches engage fully, with no misaligned catch or loose hardware. Lock the caster brakes when the crate is in use, and do not move it with your dog inside.
What I liked during the demonstration
Wide doors and access from above
The French doors open up the front of the crate nicely. I can reach the floor and bedding without squeezing through a single small doorway. The top gives me another way to interact with my dog while the front doors stay closed. I demonstrated opening it to pet my dog, then closing it again.
A smooth perforated floor and less rattling
The floor is perforated metal rather than an open wire grid. On my unit, I did not find sharp edges when checking it. I would still inspect the floor, door edges, and hardware on any crate before introducing a dog, and choose bedding that suits the dog and fits without obstructing the doors.
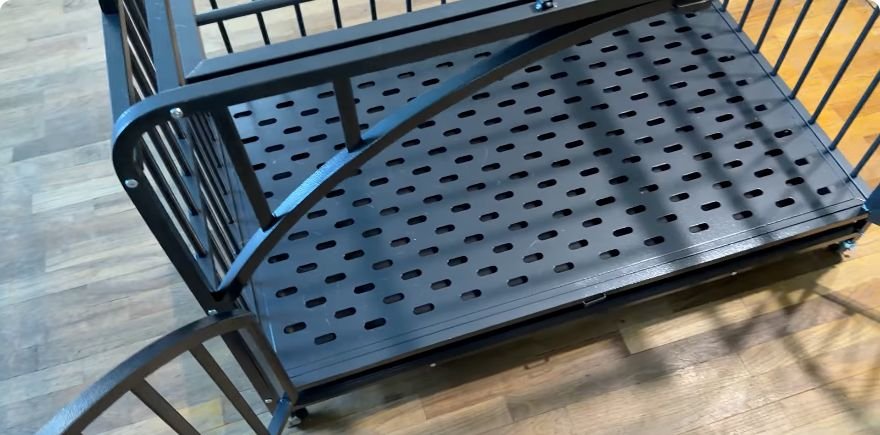
The other pleasant surprise was the sound. With my dog moving inside, the crate was not making much metal noise in that demonstration. That is an observation from this session, not a promise that it will stay silent with every dog or on every floor.
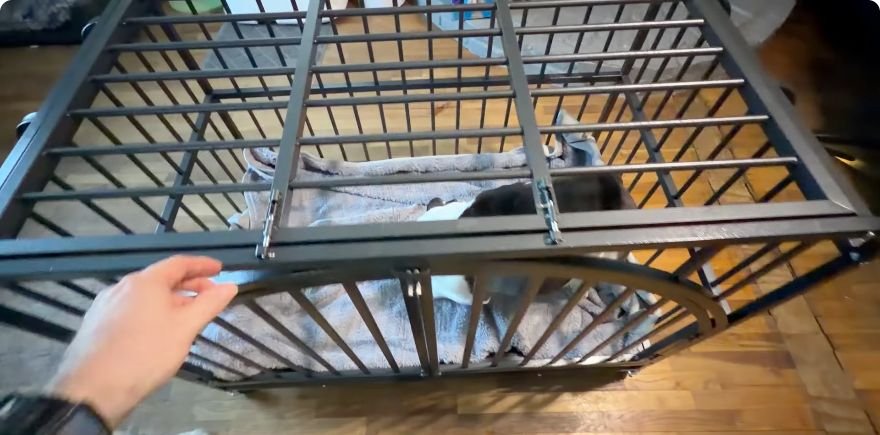
Two limitations worth knowing
The top has no built-in opening stop
When I lifted the lid, it could travel far back. There was no built-in stop or support holding it at a convenient open angle. Keep a hand on it while opening and closing, give it clearance behind the crate, and keep fingers and paws out of its path. Close and secure it after use rather than leaving it hanging open unattended.
The tray is removable, but the bottom is not sealed
The tray catches material falling through the floor, but there are gaps around the lower assembly. I pointed out that a potty accident could seep through those gaps instead of staying entirely in the tray. I would not rely on this crate alone to protect a floor from urine. Consider an appropriate waterproof floor protector and inspect underneath during cleanup.
What “indestructible” and “high anxiety” do—and don’t—tell you
Those phrases appear in the product’s marketing. I did not perform a destructive test or test a dog making sustained escape attempts, so I cannot call it indestructible or escapeproof. A strong metal frame also does not resolve the reason a dog is anxious.
Introduce the crate gradually, using short positive sessions and allowing voluntary entry. If your dog panics or tries to injure itself getting out, seek help rather than assuming heavier bars are the solution. The RSPCA recommends consulting a vet about behavior concerns and building a positive association with the crate.
Watch my complete assembly and dog demonstration
The video shows the panel alignment, floor supports, caster installation, opening top, tray, and door latches more clearly than a product photo can. It also includes the moment I put my dog inside to see how the finished crate behaved.
Would I buy this style of crate?
I like the finished result. The French doors, sturdy feel, and quiet initial dog test make this a useful option to consider if you want a substantial metal crate with easier access. I would make the purchase decision around your dog’s actual fit, the lid clearance, and your cleanup needs—not the word “indestructible.”
For my setup, those wide doors are the standout. The tray gaps and unsupported lid travel are the details I would want to know in advance. If those tradeoffs work for you and the interior is large enough for your dog, this design is worth a closer look.
See the current French door crate listing and price on Amazon
For more of my hands-on tests, visit SLVRBCK Troop Reviews.