
I like using the three-cut method when removing tree branches with my Ryobi reciprocating saw and a pruning blade. In my experience, separating the branch removal from the final trim gives me cleaner results and helps me avoid pulling bark down the tree as a branch falls.
The branch in my video is small and was used for demonstration purposes. It shows the order of the cuts, not a test of large-limb capacity. A heavier branch needs more clearance and planning, and a small branch may be easier to handle with a hand pruning saw or loppers.
Affiliate disclosure: I may earn a small commission if you purchase through my links. Your price stays the same, and it helps support SLVRBCK Troop. As an Amazon Associate, I earn from qualifying purchases.
One important clarification: preserve the branch collar
In the video, I describe trimming the remaining stub “kind of flush.” The more precise instruction is to finish just outside the branch collar and bark ridge, without cutting into the trunk. The collar is the slightly swollen area where the branch joins the tree. Leave that tissue intact rather than shaving the cut flat against the trunk.
The University of Delaware’s pruning guidance explains that the three-cut method helps prevent bark stripping and that the finishing cut should preserve the collar. That is the tree-care principle behind this guide.
Watch my Ryobi pruning demonstration
What the three cuts do
- Cut 1: the undercut. A shallow notch underneath interrupts the bark before the branch separates.
- Cut 2: the removal cut. A top cut farther out toward the branch tip removes its weight while leaving a short stub.
- Cut 3: the finishing cut. With the weight gone, remove the stub just outside the collar.
This is why I prefer the sequence over making one cut close to the trunk and letting the full branch weight pull on the remaining fibers. It can reduce tearing, but correct placement, a suitable tool, and a controlled work area still matter.
Choose the blade and plan the work
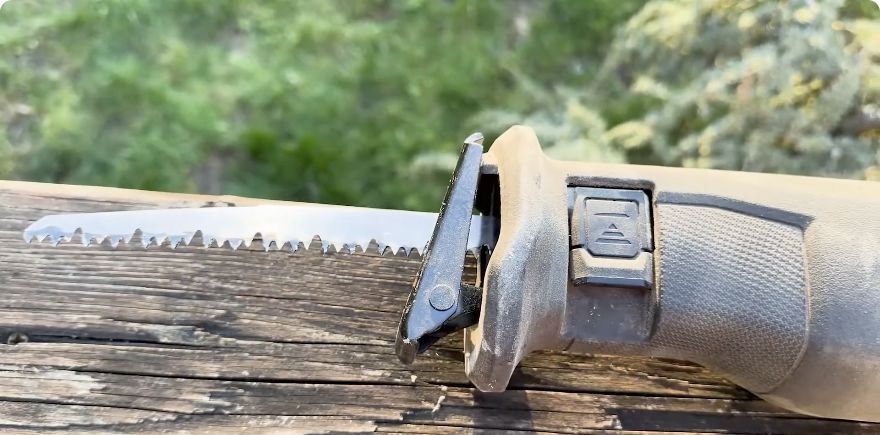
I used a pruning blade rather than a metal-cutting blade. Match its shank, length, and intended use to your saw and the branch. The blade needs enough clearance to remain through the wood throughout its stroke without hitting nearby branches, fencing, or other objects.
- Work from stable ground with eye protection, suitable footwear, and hearing protection as appropriate. Keep people and pets out of the branch’s fall area.
- Use both hands on the designated grips for this style of saw. A small demonstration branch is not a reason to recommend one-handed cutting.
- Keep hands away from the blade path and do not hold a branch by hand while operating the saw.
- Leave high, heavy, damaged, or tensioned limbs—and work near power lines—to a qualified arborist. Do not use the reciprocating saw from a ladder or reach overhead.
Follow the operator’s manual for your exact model. The Ryobi P519/P519VN manual, for example, requires disconnecting power before accessory changes and warns against ladders or unstable supports. This reference is not an identification of the exact model in my video.
Step 1: identify the collar and mark the cut order
Before switching on, find the collar at the branch base and decide where the branch will fall. Plan the first two cuts farther out along the branch, leaving the collar untouched for the third cut. The distances in a small demonstration should not be copied onto a heavy limb.
For a larger limb, University of California guidance illustrates an undercut about one-quarter of the way through, one to two feet out from the trunk, followed by a top cut about two inches farther out. These are placement examples, not permission to tackle a branch beyond your equipment or ability to control its fall.
Step 2: set the blade for the underside cut
At 0:29, I demonstrate the blade-release lever and reverse the blade orientation so the teeth can work from underneath. Use that arrangement only if your model’s manual permits it.
Remove the battery—or unplug a corded saw—before touching the blade clamp. Let the blade stop and cool first. Open the release, seat the blade fully in the approved orientation, close the clamp, and check that it is secure before restoring power. Reversing the blade changes access; it does not change the need to hold the tool correctly.
Step 3: make the shallow undercut
With your stance clear of the falling section, place the blade at the planned underside position. Keep the shoe against the branch where the tool’s instructions allow and use light, controlled pressure. Stop at the shallow notch; do not cut all the way through from below.
The point of this first cut is to interrupt the bark, not to release the branch yet. If the blade binds or the branch starts moving unpredictably, release the trigger, let it stop, and reassess before continuing.
Step 4: make the top cut farther toward the branch tip
I change the blade orientation again around 1:00 and demonstrate the top cut around 1:21. Disconnect power for that blade change too.
“Beyond the undercut” means farther from the trunk, toward the branch tip. Make the top cut at that position, keeping clear of the section that will fall. Do not try to catch it or pull it off by hand. Let the saw do the cutting rather than forcing it.
Step 5: remove the stub just outside the collar
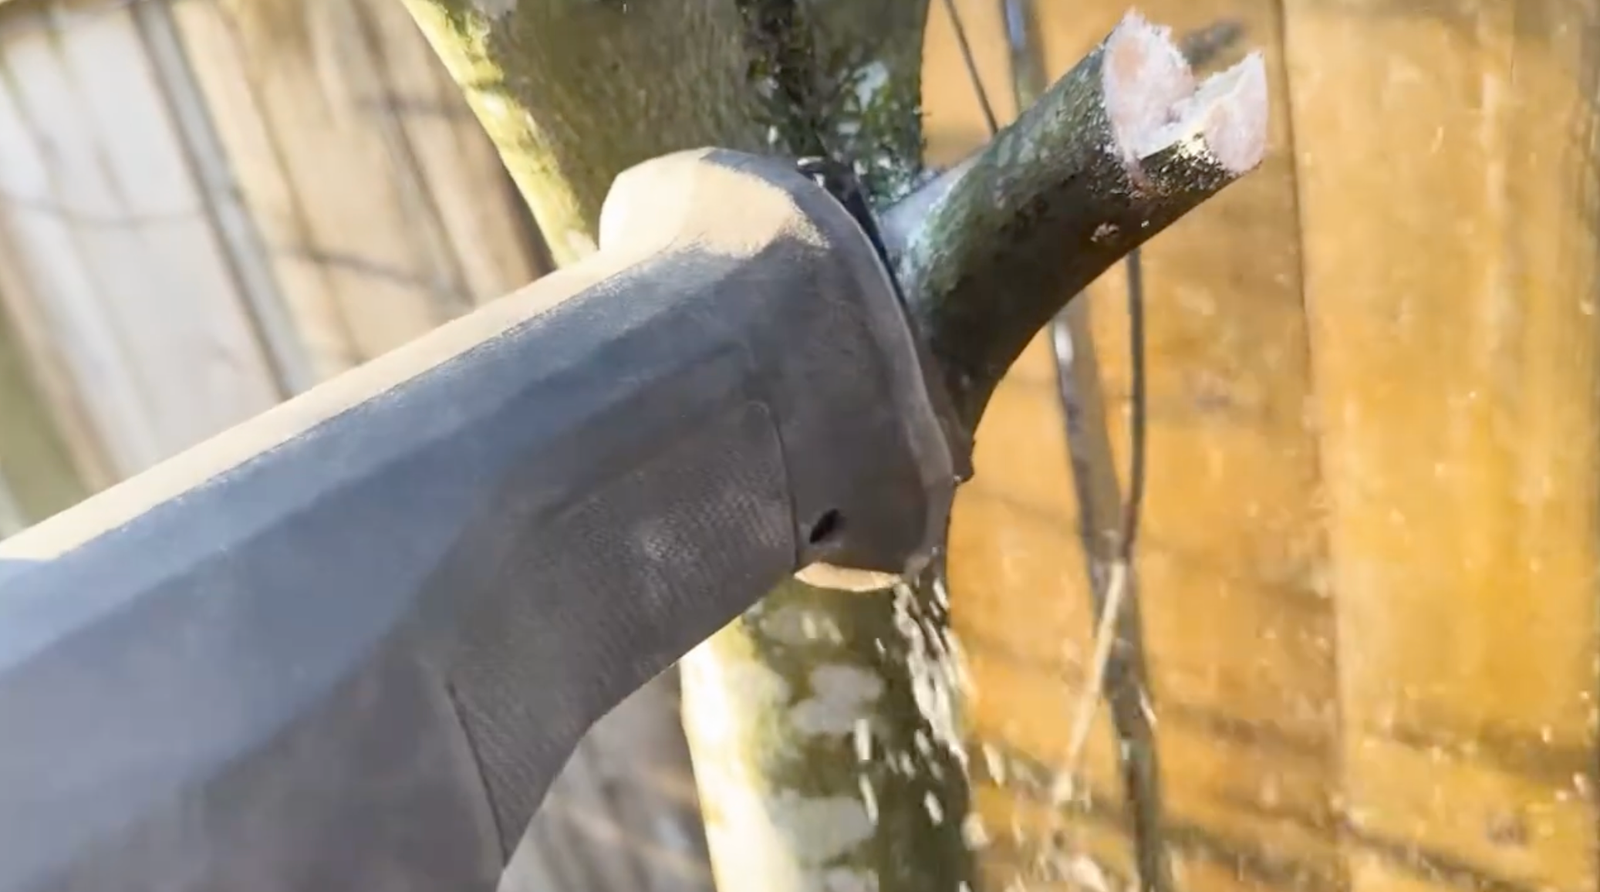
Once the outer section is gone, inspect the remaining stub and make the third cut outside the branch collar and bark ridge. Do not leave a long projecting stub, and do not cut away the collar to make the trunk look flat. Work only where you can keep both grips secure and the blade clear of adjacent growth.
A smooth-looking surface alone does not prove that the cut was placed correctly. My preference for this method is based on the cleaner separation I see; the finishing location is what preserves the tree’s protective tissue.
When should you prune?
Check timing for your tree species and local conditions. Routine pruning of many deciduous trees is done during dormancy, but flowering habits and disease risks can change the timing. Publishing this guide in autumn is not a recommendation to prune every tree now. Ask your local extension service if you are unsure.
Common mistakes to avoid
- Making the top cut on the trunk side of the undercut instead of farther out.
- Removing a heavy branch with a single cut at its base.
- Cutting flush through the collar or leaving a long stub.
- Changing blade orientation with the battery connected.
- Using excess pressure, an unsuitable blade, or an unstable position to finish the job.
My takeaway
For accessible branches suited to the tool, I like the control the three-cut sequence gives me: notch underneath, remove the outer section, then finish at the collar. The small branch in my video makes that order easy to see. It does not replace the planning needed for a heavier limb.
See my pruning-tool affiliate link on Amazon. Check the current listing and compatibility before ordering. I may earn a small commission at no extra cost to you.
For more hands-on projects, browse my DIY & How-To articles.